
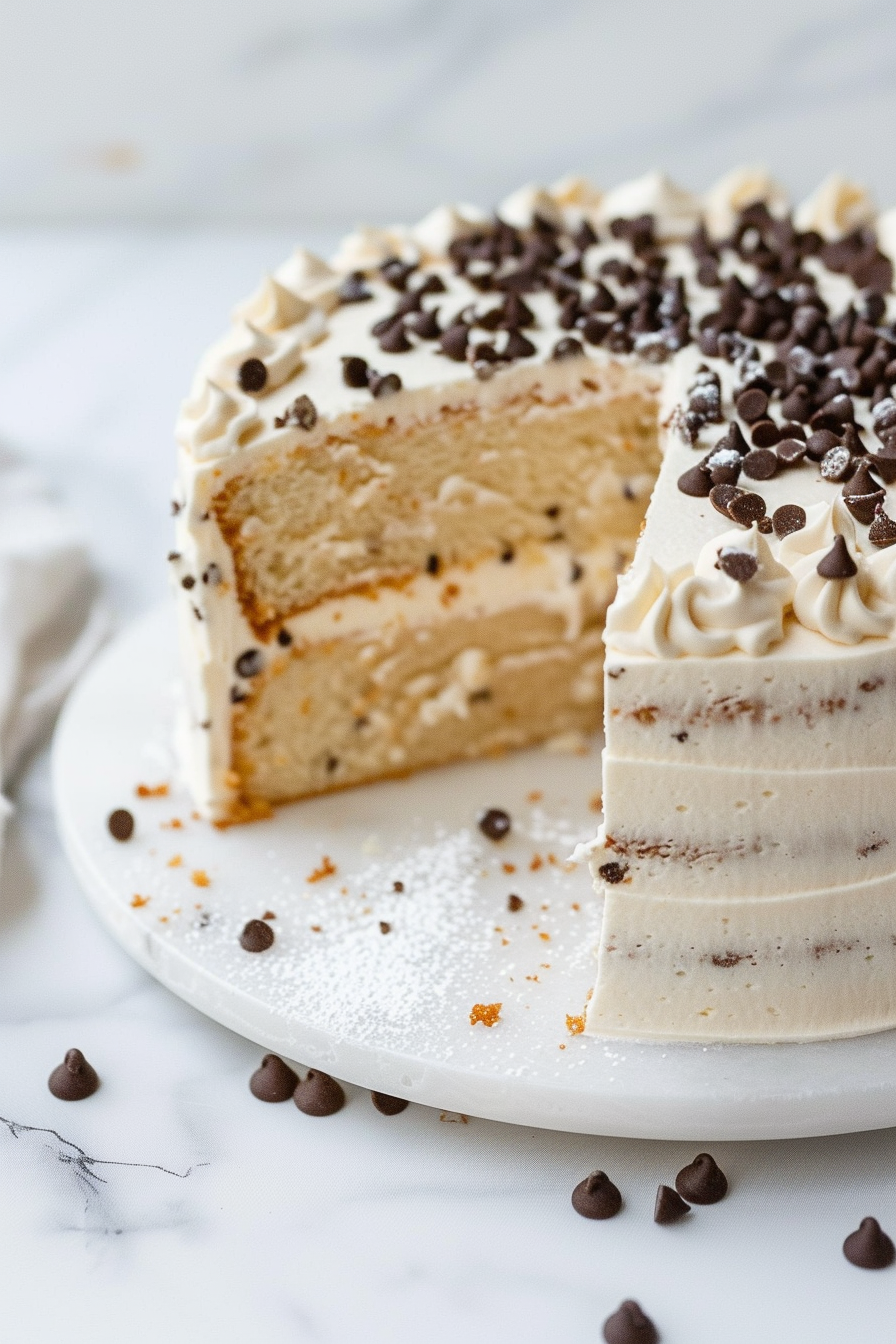
This cannoli cake is a soft, bakery-style vanilla layer cake filled with smooth ricotta mascarpone cannoli cream and mini chocolate chips, finished with a light whipped frosting and a dusting of powdered sugar. Inspired by classic Italian cannoli, this layered dessert delivers rich, creamy flavor with perfectly balanced sweetness and a clean, sliceable texture.
It’s easy to make yet impressive enough for birthdays, holidays, or any special occasion. The flavors deepen as it chills, making it even better the next day, with every bite tasting like a classic cannoli transformed into a stunning cake.
💖 Why You’ll Love This Cannoli Cake
This cannoli cake combines everything you love about classic Italian cannoli in one elegant layered dessert. With soft vanilla cake, creamy ricotta mascarpone filling, mini chocolate chips, and fluffy frosting, this recipe is rich, smooth, and perfect for special occasions.
It has classic cannoli flavor in cake form
If you love traditional cannoli, this cake gives you that same creamy ricotta filling, sweet vanilla flavor, and chocolate chip finish in a beautiful sliceable dessert.
The filling is smooth, rich, and bakery-style
The ricotta mascarpone filling creates the signature cannoli flavor while staying thick, creamy, and easy to layer between the cake rounds.
It looks impressive but is easy to make
This cannoli cake is simple enough for home bakers, but it still looks like a bakery-style dessert that is perfect for birthdays, holidays, and celebrations.
It tastes even better after chilling
After a few hours in the refrigerator, the filling sets beautifully and the flavors blend together, making this cannoli cake even more delicious the next day.
It is perfect for holidays and special occasions
Whether you are making it for Easter, Christmas, a birthday, or a dinner party, this cannoli cake is a stunning dessert that feels both classic and unique.
🧁 Ingredient Notes for Cannoli Cake
Using the right ingredients makes all the difference when you want a cannoli cake with smooth filling, soft layers, and classic bakery-style flavor. Each ingredient in this recipe helps create the rich texture and balanced sweetness that makes this dessert so special.
Whole milk ricotta
Whole milk ricotta gives the filling its classic cannoli flavor and creamy texture. Make sure it is well drained before using so the filling stays thick and easy to layer.
Mascarpone cheese
Mascarpone adds richness and helps create a smooth, stable cannoli filling. It also gives the frosting a soft, luxurious texture that pairs perfectly with the ricotta.
Mini chocolate chips
Mini chocolate chips bring the signature cannoli flavor and add a little texture to every bite. Their smaller size helps them distribute evenly throughout the filling.
Orange zest
Orange zest adds a bright, classic bakery-style note that lifts the filling and gives the cake a more authentic cannoli-inspired flavor.
Cinnamon
A small amount of cinnamon adds warmth and depth without overpowering the filling. It helps bring out the traditional cannoli flavor in a subtle way.
Vanilla extract
Vanilla adds sweetness and rounds out the flavor of both the cake and the filling. It helps tie all of the creamy and citrus notes together.
All-purpose flour
All-purpose flour gives the cake layers enough structure to hold the filling while still staying soft and tender.
Sour cream
Sour cream keeps the cake moist and gives the crumb a soft, rich texture that stays delicious even after chilling.
Heavy whipping cream
Heavy whipping cream is used to make the light frosting that finishes the cake. It creates a fluffy texture that balances the richer cannoli filling.
🍰 How to Make Cannoli Cake
This cannoli cake comes together in a few simple steps and tastes like a bakery-style Italian dessert made right at home. The soft vanilla cake layers, creamy ricotta mascarpone filling, and fluffy frosting create a beautiful dessert that is rich, balanced, and perfect for special occasions.
1. Prepare the cake pans and oven
Preheat your oven to 350°F. Grease two 8-inch round cake pans and line the bottoms with parchment paper so the cake layers release easily after baking.
2. Mix the dry ingredients
In a medium bowl, whisk together the all-purpose flour, baking powder, salt, and cinnamon. This helps evenly distribute the leavening and spices throughout the cake batter.
3. Cream the butter and sugar
In a large mixing bowl, beat the softened butter and granulated sugar until light and fluffy. This step helps create a soft, tender cake with a lighter crumb.
4. Add the eggs and flavorings
Add the eggs one at a time, mixing well after each addition. Mix in the vanilla extract and orange zest until the batter is smooth and well combined.
5. Finish the cake batter
Add the sour cream and mix until combined. Then alternate adding the dry ingredients and the milk, beginning and ending with the dry ingredients. Mix just until the batter is smooth.
6. Bake the cake layers
Divide the batter evenly between the prepared cake pans and smooth the tops. Bake for 28 to 32 minutes, or until a toothpick inserted into the center comes out clean. Let the cakes cool completely before assembling.
7. Make the cannoli filling
Add the well-drained ricotta to a food processor or mash it until very smooth. Transfer it to a bowl, then mix in the mascarpone, powdered sugar, vanilla extract, orange zest, cinnamon, salt, and optional almond extract until creamy. Fold in the mini chocolate chips, then chill the filling for 1 to 2 hours.
8. Make the frosting
In a mixing bowl, beat the mascarpone, powdered sugar, vanilla extract, and salt until smooth. Slowly add the heavy whipping cream, then whip until firm peaks form that still look smooth and creamy.
9. Assemble the cannoli cake
Level the cake layers if needed. Spread about a 1/2-inch layer of cannoli filling over the first cake layer, then place the second cake layer on top. Frost the outside of the cake with the mascarpone whipped frosting.
10. Chill and decorate
Chill the assembled cake for at least 2 hours, or overnight for the best texture and flavor. Before serving, garnish with mini chocolate chips, crushed pistachios, or a light dusting of powdered sugar if desired.
👩🍳 Pro Tips for the Best Cannoli Cake
These simple tips will help you achieve a smooth cannoli filling, soft cake layers, and a clean, bakery-style finish every time. Small details make a big difference with this cannoli cake recipe.
Drain the ricotta well
For the best texture, use well-drained ricotta that is thick and not watery. Excess moisture can make the filling too soft and harder to layer between the cake.
Smooth the ricotta completely
Take a minute to fully smooth the ricotta using a food processor or by mashing thoroughly. This step creates a creamy, bakery-style cannoli filling without any graininess.
Use room temperature cake ingredients
Let the butter, eggs, milk, and sour cream come to room temperature before mixing. This helps the batter come together smoothly and creates a softer cake crumb.
Do not overmix the batter
Mix just until the ingredients are combined when finishing the cake batter. Overmixing can make the cake dense instead of light and tender.
Chill the filling before assembling
Refrigerating the cannoli filling for at least 1 to 2 hours makes it thicker and easier to spread between the cake layers without shifting.
Watch the frosting carefully
Whip the frosting until it holds firm peaks but still looks smooth. Stop before it becomes grainy to avoid overwhipping.
Keep the filling layer even
Spread the filling to about a 1/2-inch thickness so the cake layers stay stable and do not slide when stacked.
Chill before slicing
Refrigerate the assembled cake for at least 2 hours before slicing. This helps the filling set and gives you clean, neat slices.
Let the flavors develop
This cannoli cake tastes even better the next day as the ricotta, mascarpone, and cake layers blend together for a richer flavor.
✨ Variations for Cannoli Cake
This cannoli cake is easy to customize if you want to change the flavor, texture, or presentation. These simple variations let you create a dessert that feels classic, creative, or even more bakery-inspired while keeping the same rich ricotta mascarpone flavor.
Chocolate cannoli cake
Turn this into a chocolate cannoli cake by using chocolate cake layers instead of vanilla. The cocoa flavor pairs beautifully with the creamy cannoli filling and mini chocolate chips.
Cannoli sheet cake
For an easier version, bake the cake in a 9×13 pan and spread the cannoli filling and frosting over the top. This is a great option for parties, holidays, and casual gatherings.
Cannoli poke cake
Transform the recipe into a cannoli poke cake by baking the cake in one pan, poking holes in the surface, and spreading the filling over the top so it settles into the cake.
Mini cannoli cakes
Use the batter to make mini layer cakes or cupcakes for individual servings. These are perfect for birthdays, showers, or dessert tables.
Extra chocolate chip cannoli cake
For more texture and sweetness, add extra mini chocolate chips to the filling and sprinkle more over the top before serving.
Citrus cannoli cake
Boost the orange flavor by adding a little extra orange zest to the filling or cake layers for a brighter, more fragrant dessert.
Cinnamon cannoli cake
Increase the cinnamon slightly if you want a warmer flavor that feels even more like a classic bakery-style cannoli.
Decorated celebration cannoli cake
Dress it up with swirls of frosting, a dusting of powdered sugar, mini chocolate chips, and elegant piping for a beautiful birthday or holiday dessert centerpiece.
🧊 Storage and Make Ahead for Cannoli Cake
This cannoli cake stores well and is perfect for making ahead, since the flavors improve after chilling. Proper storage keeps the cake fresh, creamy, and easy to slice.
How to store cannoli cake
Store the cake covered in the refrigerator for up to 3 days. Keep it in an airtight container or loosely covered with plastic wrap to prevent it from drying out.
Best way to serve
Serve the cake slightly chilled or let it sit at room temperature for 10 to 15 minutes before slicing for the best texture and flavor.
Make ahead instructions
You can make this cannoli cake a day in advance. In fact, it tastes even better the next day as the flavors from the ricotta filling and cake layers blend together.
Make the filling ahead
The cannoli filling can be made up to 2 days ahead and stored in the refrigerator. Keep it covered and stir gently before using if needed.
Make the cake layers ahead
The cake layers can be baked up to 2 days in advance. Wrap them tightly in plastic wrap and store at room temperature or refrigerate for longer freshness.
Freezing instructions
You can freeze the unfrosted cake layers for up to 2 months. Wrap them tightly in plastic wrap and place in a freezer-safe bag. Thaw in the refrigerator before assembling the cake.
Assembling ahead of time
For best results, assemble the cake the day you plan to serve it or the night before. This ensures the filling stays fresh while still allowing the flavors to develop.
❓ Frequently Asked Questions About Cannoli Cake
If you are making cannoli cake for the first time, these helpful answers will guide you through the most common questions about texture, flavor, storage, and substitutions.
What does cannoli cake taste like?
Cannoli cake tastes like a classic Italian cannoli transformed into a layered dessert. It has soft vanilla cake, creamy ricotta mascarpone filling, mini chocolate chips, and a lightly sweet frosting.
Does cannoli cake need to be refrigerated?
Yes, cannoli cake should be refrigerated because the filling and frosting contain ricotta, mascarpone, and heavy cream. Store it covered in the refrigerator until ready to serve.
Can I make cannoli cake ahead of time?
Yes, this cake is great for making ahead. It actually tastes even better after chilling because the flavors have time to blend and the filling firms up nicely.
Can I use store-bought ricotta?
Yes, store-bought whole milk ricotta works well, but it should be well drained before using. Thick ricotta gives the filling the best texture and helps the cake hold its shape.
Why is my cannoli filling grainy?
The filling can turn grainy if the ricotta is not smoothed properly before mixing. Use a food processor or mash it thoroughly until creamy for the best bakery-style texture.
Can I freeze cannoli cake?
You can freeze the unfrosted cake layers, but the assembled cake is best enjoyed fresh from the refrigerator. Dairy-based fillings and frostings can change texture after freezing and thawing.
Can I make this as cupcakes instead of a layer cake?
Yes, you can turn this recipe into cannoli cupcakes or mini cakes for individual servings. They are great for parties, birthdays, and dessert tables.
What can I use instead of mascarpone?
Cream cheese can work in a pinch, but the flavor will be tangier and less like a traditional cannoli. Mascarpone gives the filling and frosting a smoother, richer texture.
How long does cannoli cake last in the fridge?
Cannoli cake will stay fresh in the refrigerator for up to 3 days when stored covered. For the best flavor and texture, enjoy it within the first couple of days.

Cannoli Cake with Ricotta Filling and Mascarpone Frosting
Equipment
- 2 8-inch round cake pans
- Mixing bowls (large and medium)
- Hand mixer or stand mixer
- Rubber spatula
- Whisk
- Measuring cups and spoons
- Food processor or fine mesh sieve (for smoothing ricotta)
- Offset spatula or icing spatula
- Cake turntable (optional, for easier frosting)
- Parchment paper
- Cooling rack
- Serrated knife (for leveling cake layers)
Ingredients
🎂 Cake
- 2 ½ cups all-purpose flour
- 2 ½ tsp baking powder
- ¾ tsp salt
- ¾ cup unsalted butter softened
- 1 ½ cups granulated sugar
- 4 large eggs
- 1 tbsp vanilla extract
- ½ tsp orange zest
- ¼ tsp cinnamon
- 1 cup whole milk
- ½ cup sour cream
🧀 Cannoli Filling
- 340 g 1½ cups well-drained whole milk ricotta (thick, not watery)
- ¾ cup mascarpone
- ½ cup powdered sugar
- 1 tsp vanilla extract
- ½ tsp orange zest
- ¼ tsp cinnamon
- pinch of salt
- ⅛ tsp almond extract optional
- ½ cup mini chocolate chips
🍦 Frosting
- ½ cup mascarpone cool room temperature
- ½ cup powdered sugar
- 1 tsp vanilla extract
- pinch of salt
- 1 ½ cups heavy whipping cream
✨ Garnish (Optional)
- Mini chocolate chips
- Crushed pistachios
- Powdered sugar
Instructions
Make the Cake
- Preheat oven to 350°F. Grease and line two 8-inch cake pans.
- In a bowl, whisk flour, baking powder, and salt.
- In another bowl, cream butter and sugar until light and fluffy (3–4 minutes).
- Add eggs one at a time, mixing well after each addition.
- Mix in vanilla, orange zest, and cinnamon.
- Add sour cream and mix until combined.
- Alternate adding dry ingredients and milk, beginning and ending with dry ingredients.
- Divide batter evenly between pans.
- Bake for 28–32 minutes or until a toothpick comes out clean.
- Cool completely before assembling.
Make the Cannoli Filling
- Smooth ricotta completely using a food processor or mash until creamy.
- Add mascarpone, powdered sugar, vanilla, orange zest, cinnamon, salt, and almond extract.
- Mix until smooth and combined.
- Fold in mini chocolate chips.
- Chill for 1–2 hours.
Make the Frosting
- In a bowl, beat mascarpone, powdered sugar, vanilla, and salt until smooth.
- Add heavy cream gradually.
- Whip until firm peaks form that hold their shape but still look smooth (do not overwhip).
Assemble the Cake
- Level cake layers if needed.
- (Optional) Chill layers 20 minutes if your kitchen is warm.
- Spread a ½-inch layer of cannoli filling over the first cake layer.
- Place second layer on top.
- Frost the entire cake with mascarpone whipped frosting.
- Garnish with chocolate chips, pistachios, and powdered sugar.
Chill & Serve
- Chill cake for at least 2 hours (overnight preferred).
- Slice and serve chilled or slightly softened.
Notes
- For the best cannoli cake texture, use well-drained whole milk ricotta. It should be thick and not watery, since excess moisture can make the filling too soft.
- Smooth the ricotta completely using a food processor or by mashing thoroughly to create a creamy, bakery-style cannoli filling without graininess.
- Mascarpone adds richness and helps stabilize the filling so it holds its shape between cake layers.
- Mix gently after adding mascarpone and avoid overmixing to keep the filling thick and smooth.
- Orange zest and cinnamon provide a classic cannoli flavor that pairs well with the creamy filling and soft cake layers.
- Almond extract is optional, but even a small amount adds a subtle bakery-style aroma that enhances the overall flavor.
- Chill the filling before assembling the cake so it spreads easily and stays in place between layers.
- When making the frosting, whip until it holds firm peaks that still look smooth. Stop before it becomes grainy to avoid curdling.
- Chilling the assembled cake for at least 2 hours helps the layers set and makes slicing much cleaner.
- For the best flavor and texture, the cake tastes even better the next day after the ingredients have had time to meld.
- Store the cake covered in the refrigerator for up to 3 days and serve slightly chilled.
- Garnish with mini chocolate chips, crushed pistachios, or a light dusting of powdered sugar for added texture and visual appeal.
🍰 More Cake Recipes You’ll Love
If you loved this cannoli cake, here are more delicious cake recipes to try next. These recipes feature a mix of fruity, creamy, and rich flavors that are perfect for any occasion.
- Blackberry Lemonade Cake – A bright and refreshing cake with sweet blackberries and tangy lemon flavor.
- Ginger Pear Upside Down Cake – A cozy, spiced cake with caramelized pears and warm ginger notes.
- Cotton Candy Cake – A fun and colorful cake with a light, sweet flavor inspired by cotton candy.
- Mango Passionfruit Chantilly Cake – A tropical-inspired cake with fresh fruit flavors and airy whipped cream.
- Espresso Tres Leches Cake – A rich and creamy cake soaked in espresso-infused milk for a bold dessert.
Leave a Reply