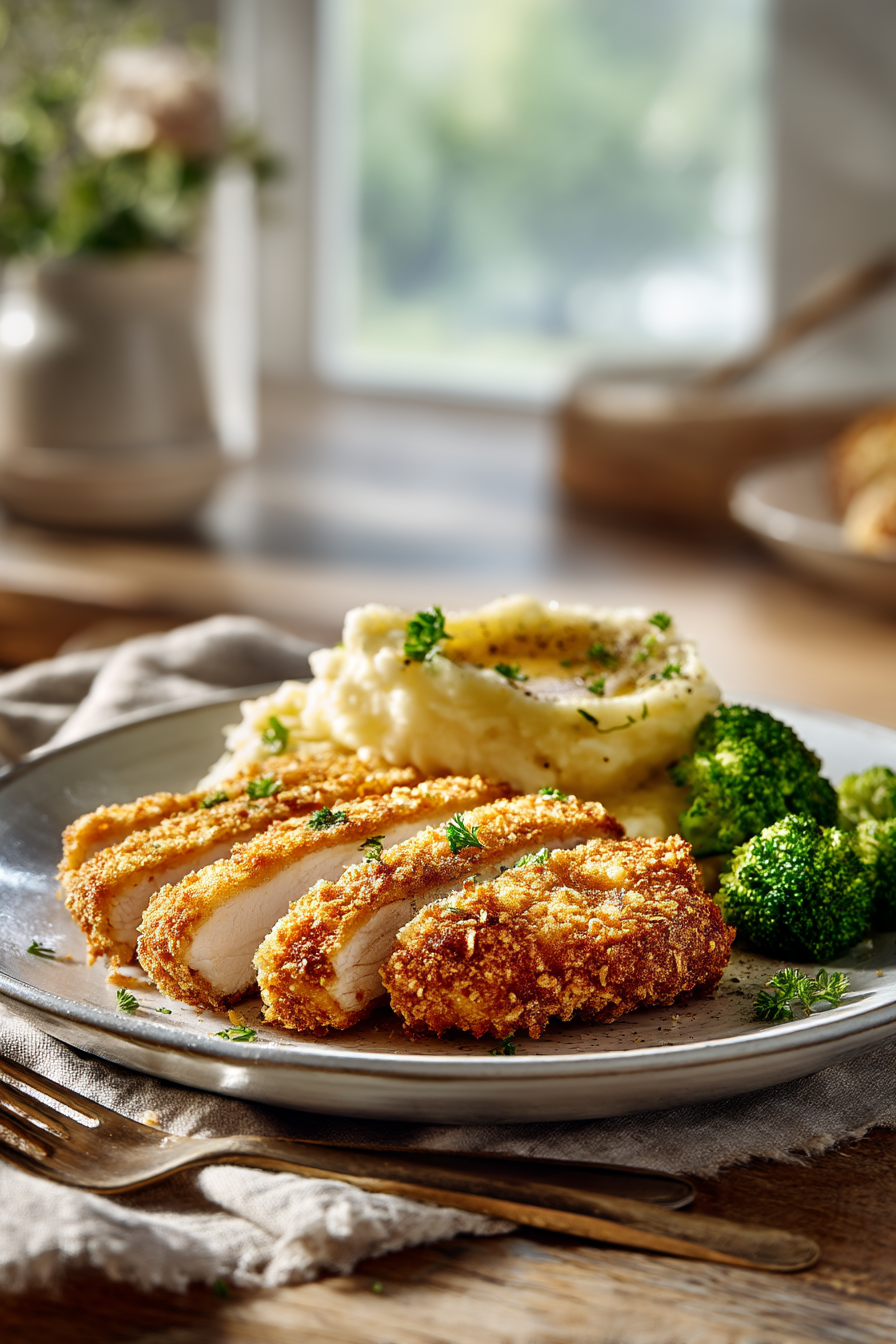
If you’re looking for the ultimate crispy cornflake chicken recipe, you’ve come to the right place! This easy baked chicken is coated in a perfectly seasoned cornflake crust that bakes up irresistibly crunchy while keeping the chicken tender and juicy inside. It’s a family-friendly dinner that’s simple enough for busy weeknights but delicious enough to serve for Sunday supper.
Unlike traditional fried chicken, this baked cornflake chicken delivers incredible crunch with less mess and no deep fryer required. The combination of seasoned flour, a flavorful egg wash, and crispy cornflakes creates a golden, crispy coating that’s packed with flavor in every bite. Pair it with mashed potatoes, roasted vegetables, mac and cheese, or a fresh salad for a comforting meal everyone will love.
Whether you’re making dinner for picky eaters or feeding a crowd, this crispy cornflake chicken recipe is easy to prepare, uses simple pantry ingredients, and comes out perfectly golden every single time.
💗 Why You’ll Love This Crispy Cornflake Chicken
This crispy cornflake chicken is an easy baked chicken dinner with a golden, crunchy coating and juicy, tender chicken inside. It gives you the comfort-food flavor of fried chicken without deep frying, making it perfect for busy weeknights, family dinners, or cozy Sunday meals.
Golden and Crunchy
The seasoned cornflake coating bakes up crisp, textured, and beautifully golden, giving every bite that satisfying crunch.
Juicy Chicken Every Time
Pounding the chicken to an even thickness helps it cook evenly, so the inside stays moist while the outside gets crispy.
Easy Oven-Baked Dinner
This baked cornflake chicken uses simple pantry ingredients and does not require a deep fryer, making cleanup easier and dinner less stressful.
Family-Friendly Flavor
The seasoning is savory, mild, and comforting, so this crispy chicken recipe works well for both kids and adults.
Perfect With Classic Sides
Serve it with mashed potatoes, mac and cheese, roasted vegetables, coleslaw, or your favorite dipping sauce for a complete comfort-food meal.
🛒 Ingredient Notes
Simple pantry staples come together to create this crispy cornflake chicken with a perfectly seasoned coating and juicy, tender chicken. Each ingredient plays an important role in creating the best texture and flavor.
Boneless, Skinless Chicken Breasts
Chicken breasts are lean, tender, and perfect for baking. Pound them to an even ½-inch thickness so they cook evenly and stay juicy while the cornflake coating becomes perfectly crisp.
All-Purpose Flour
The flour creates the first layer of breading and gives the egg wash and cornflakes something to stick to. It also helps create a sturdy, crispy crust.
Cornstarch
A small amount of cornstarch lightens the flour coating and helps create an extra crispy texture without making the breading heavy.
Eggs
Eggs act as the binder that holds the breading together, ensuring every bite is coated in crunchy cornflakes.
Buttermilk
Just a little buttermilk adds richness and helps tenderize the chicken while improving the adhesion of the coating.
Plain Cornflakes
Plain, unsweetened cornflakes are the star of this recipe. Once crushed, they bake into a wonderfully crunchy coating with a lightly toasted flavor that pairs perfectly with the seasoned chicken.
Garlic Powder and Onion Powder
These pantry staples provide savory depth throughout the coating without overpowering the mild flavor of the chicken.
Paprika and Smoked Paprika
Paprika adds beautiful golden color and a mild sweetness, while a small amount of smoked paprika adds subtle depth and richness.
Dried Parsley
A touch of dried parsley adds color and a light herb flavor that complements the crispy coating.
Kosher Salt and Black Pepper
Seasoning each layer of the breading ensures every bite is flavorful from the crispy exterior to the juicy chicken inside.
Cayenne Pepper (Optional)
If you enjoy a little heat, add cayenne pepper for a gentle kick without overpowering the other flavors.
Cooking Spray or Melted Butter
A light coating of cooking spray or a small drizzle of melted butter encourages even browning and helps the cornflake coating become beautifully crisp in the oven.
👩🍳 How to Make Cornflake Chicken
This baked cornflake chicken is simple to prepare and comes out golden, crunchy, and juicy. The key is to season every layer, press the cornflakes firmly onto the chicken, and bake the pieces on a wire rack for the crispiest texture.
Prepare the Baking Sheet
Preheat the oven to 400°F. Line a large baking sheet with parchment paper, then place an oven-safe wire rack on top. Lightly grease the rack so the crispy coating does not stick.
Prepare the Chicken
Pat the chicken dry with paper towels, then pound each piece to an even ½-inch thickness. Season both sides with kosher salt and black pepper so the chicken itself is flavorful before breading.
Set Up the Breading Stations
In one shallow bowl, whisk together the flour, cornstarch, and seasonings. In a second bowl, whisk together the eggs, buttermilk, and salt. In a third bowl, combine the crushed cornflakes with the remaining spices.
Coat the Chicken
Dredge each piece of chicken in the flour mixture, dip it into the egg wash, then press it firmly into the seasoned cornflakes. Let any excess egg drip off before adding the cornflake coating so the breading stays crisp instead of gummy.
Let the Breading Rest
Place the coated chicken on the prepared wire rack and let it rest for 10 minutes before baking. This helps the cornflake coating stick to the chicken and reduces the chance of the breading falling off.
Bake Until Crispy
Lightly spray the tops with cooking spray or drizzle with a small amount of melted butter. Bake for 10–12 minutes, then carefully flip the chicken, rotate the pan, and bake for another 10–14 minutes until the coating is golden and the chicken reaches 165°F after resting.
Rest and Serve
Let the cornflake chicken rest on the wire rack for 5 minutes before serving. This keeps the chicken juicy and helps the crispy coating stay attached. Serve warm with mashed potatoes, roasted vegetables, coleslaw, or your favorite dipping sauce.
⭐ Pro Tips
These simple tips will help you make the crispiest, juiciest cornflake chicken every time. From preparing the chicken properly to baking it on a wire rack, each step makes a noticeable difference in the final result.
Pound the Chicken Evenly
Pound each chicken breast to an even ½-inch thickness before breading. This helps every piece cook at the same rate and prevents dry edges or undercooked centers.
Pat the Chicken Dry
Remove excess moisture with paper towels before seasoning and breading. Dry chicken helps the flour coating stick better and creates a crispier finished crust.
Season Every Layer
Season the chicken, flour mixture, and cornflake coating instead of relying on just one layer. This creates well-balanced flavor throughout every bite.
Don’t Crush the Cornflakes Too Much
Leave the crushed cornflakes slightly chunky with pieces about ¼ inch in size. Larger flakes create the signature crunchy texture that makes cornflake chicken so delicious.
Let the Coated Chicken Rest
After breading, let the chicken rest on the wire rack for about 10 minutes before baking. This helps the coating adhere better and reduces the chance of it falling off during cooking.
Use a Wire Rack
Baking the chicken on an oven-safe wire rack allows hot air to circulate underneath, creating an evenly crispy coating on all sides without needing to flip repeatedly.
Cook by Temperature, Not Time
Every oven cooks a little differently, so use an instant-read thermometer to check for doneness. The chicken is ready when it reaches 165°F after resting.
Let It Rest Before Serving
Allow the chicken to rest for 5 minutes after baking. This keeps the meat juicy while giving the crispy coating time to set.
Reheat in the Oven or Air Fryer
For leftovers that taste freshly made, reheat the chicken in a 375°F oven or air fryer until heated through. This restores the crispy coating far better than using a microwave.
🍗 Variations
One of the best things about this crispy cornflake chicken recipe is how easy it is to customize. Whether you like a little heat, extra herbs, or cheesy flavors, these simple variations let you create a new family favorite with minimal effort.
Spicy Cornflake Chicken
Add ½ to 1 teaspoon of cayenne pepper to the cornflake coating and a few dashes of your favorite hot sauce to the egg wash for a crispy chicken with a little kick.
Parmesan Cornflake Chicken
Mix ¼ cup finely grated Parmesan cheese into the crushed cornflakes for an extra savory, slightly nutty flavor and an even crispier crust.
Ranch Cornflake Chicken
Stir one packet of dry ranch seasoning into the cornflake coating for a tangy, herb-filled twist that’s especially popular with kids and perfect for dipping.
Italian Herb Cornflake Chicken
Add 1 teaspoon of Italian seasoning and a little extra garlic powder to the breading for an herbaceous variation that pairs wonderfully with pasta or roasted vegetables.
Honey Mustard Cornflake Chicken
Serve the baked chicken with homemade or store-bought honey mustard sauce for a sweet and tangy combination that complements the crunchy cornflake coating.
Air Fryer Cornflake Chicken
Cook the breaded chicken in a preheated 375°F air fryer for 14–18 minutes, flipping halfway through. Lightly spray both sides with cooking oil before air frying for the crispiest results.
Chicken Tenders
Replace the chicken breasts with chicken tenders for a kid-friendly meal that cooks faster. Begin checking for doneness after about 12–15 minutes.
Gluten-Free Cornflake Chicken
Use certified gluten-free cornflakes and your favorite gluten-free all-purpose flour blend to make a delicious gluten-free version without sacrificing crunch.
🥡 Storage and Make Ahead
This crispy cornflake chicken stores surprisingly well and reheats beautifully, making it a great option for meal prep, easy lunches, or busy weeknight dinners. Follow these tips to keep the chicken as crispy and flavorful as possible.
How to Store Leftovers
Allow the chicken to cool completely before transferring it to an airtight container. Store it in the refrigerator for up to 4 days.
How to Freeze
Place the cooled chicken on a baking sheet and freeze until solid. Transfer the pieces to a freezer-safe bag or airtight container and freeze for up to 3 months. Freezing the chicken individually prevents the pieces from sticking together.
How to Reheat
For the crispiest results, reheat the chicken in a 375°F oven for 10–12 minutes or in a 375°F air fryer for 4–6 minutes until heated through. Avoid using the microwave whenever possible, as it softens the crunchy cornflake coating.
Make Ahead
You can bread the chicken up to 8 hours in advance. Arrange the coated pieces on a wire rack set over a baking sheet, cover loosely, and refrigerate until you’re ready to bake. This makes dinner preparation quick and convenient.
Freeze Before Baking
The breaded, uncooked chicken can also be frozen. Arrange the coated pieces on a baking sheet and freeze until firm, then transfer them to a freezer-safe container or bag. Bake directly from frozen, adding approximately 8–12 minutes to the cooking time and checking that the internal temperature reaches 165°F.
Meal Prep Tip
Cook a double batch and portion the chicken into individual containers with mashed potatoes, rice, or roasted vegetables for easy grab-and-go lunches throughout the week.
❓ FAQ
Can I use chicken thighs instead of chicken breasts?
Yes, boneless, skinless chicken thighs work well for cornflake chicken. They are naturally juicy and flavorful, but they may need a few extra minutes in the oven depending on their thickness.
Why is my cornflake coating falling off?
The coating may fall off if the chicken is too wet, the excess egg is not allowed to drip off, or the breaded chicken is baked immediately. Pat the chicken dry, shake off excess flour, press the cornflakes firmly onto the chicken, and let the coated pieces rest for 10 minutes before baking.
Can I make cornflake chicken in the air fryer?
Yes, air fryer cornflake chicken works beautifully. Cook it at 375°F for 14–18 minutes, flipping halfway through, until the coating is crispy and the chicken reaches 165°F internally.
What kind of cornflakes should I use?
Use plain, unsweetened cornflakes for the best savory flavor. Avoid frosted or flavored cereal, which can make the chicken too sweet and may brown too quickly in the oven.
Can I make this recipe gluten-free?
Yes, use certified gluten-free cornflakes and a gluten-free all-purpose flour blend. The chicken will still bake up crispy and flavorful with the same method.
How do I keep cornflake chicken crispy?
Bake the chicken on an oven-safe wire rack so hot air can circulate around each piece. After baking, let it rest on the rack instead of moving it directly to a plate, which can trap steam and soften the coating.
What sauces go well with cornflake chicken?
Honey mustard, ranch, barbecue sauce, buffalo sauce, garlic aioli, and spicy mayo all pair well with crispy cornflake chicken. The crunchy coating also tastes great with classic gravy or a simple side of ketchup for kids.
How long does leftover cornflake chicken last?
Leftover cornflake chicken can be stored in an airtight container in the refrigerator for up to 4 days. Reheat it in the oven or air fryer for the best crispy texture.

Crispy Cornflake Chicken
Equipment
- Large rimmed baking sheet
- Oven-safe wire rack
- Parchment paper
- 3 shallow bowls
- Whisk
- Measuring cups and measuring spoons
- Rolling pin or food processor (for crushing the cornflakes)
- Tongs
- Instant-read meat thermometer
- paper towels
- Cooking spray or pastry brush (if using melted butter)
Ingredients
Chicken
- 2 pounds boneless skinless chicken breasts, pounded to an even ½-inch thickness
- ½ teaspoon kosher salt
- ¼ teaspoon black pepper
Flour Mixture
- 1½ cups all-purpose flour
- 2 tablespoons cornstarch
- 1 teaspoon kosher salt
- 1 teaspoon garlic powder
- 1 teaspoon onion powder
- ½ teaspoon paprika
- ½ teaspoon black pepper
Egg Wash
- 3 large eggs
- 2 tablespoons buttermilk
- ¼ teaspoon kosher salt
Cornflake Coating
- 6 cups plain unsweetened cornflakes, crushed into mostly ¼-inch pieces
- 1 teaspoon kosher salt
- 1¼ teaspoons garlic powder
- 1 teaspoon onion powder
- 1½ teaspoons paprika
- ½ teaspoon smoked paprika
- ¾ teaspoon black pepper
- ½ teaspoon dried parsley
- ¼ teaspoon baking powder
- ¼ teaspoon cayenne pepper optional
For Baking
- Cooking spray or 1–2 tablespoons melted butter
Instructions
- Preheat the oven to 400°F (200°C). Line a large baking sheet with parchment paper and place an oven-safe wire rack on top. Lightly grease the rack with cooking spray.
- Pat the chicken completely dry with paper towels. Pound each piece to an even ½-inch thickness. Season both sides with the kosher salt and black pepper.
- In a shallow bowl, whisk together the flour, cornstarch, kosher salt, garlic powder, onion powder, paprika, and black pepper.
- In a second shallow bowl, whisk together the eggs, buttermilk, and kosher salt until smooth.
- In a third shallow bowl, combine the crushed cornflakes, kosher salt, garlic powder, onion powder, paprika, smoked paprika, black pepper, parsley, baking powder, and cayenne pepper, if using.
- Dredge each piece of chicken in the flour mixture, shaking off any excess.
- Dip the chicken into the egg wash, allowing any excess to drip off for a few seconds.
- Press the chicken firmly into the cornflake mixture until evenly coated on all sides.
- Arrange the coated chicken on the prepared wire rack. Let it rest for 10 minutes to help the coating adhere.
- Lightly spray the tops with cooking spray or drizzle very lightly with melted butter.
- Bake for 10–12 minutes.
- Carefully flip the chicken, rotate the baking sheet, and lightly spray any dry spots if needed. Continue baking for another 10–14 minutes, or until the thickest part reaches 162–163°F (72–73°C).
- If desired, broil for 30–60 seconds for extra golden color, watching carefully to prevent the cornflakes from burning.
- Remove the chicken from the oven and let it rest on the wire rack for 5 minutes. The internal temperature will rise to 165°F (74°C).
- Serve immediately with mashed potatoes, roasted vegetables, coleslaw, mac and cheese, or your favorite dipping sauces.
Notes
Use Evenly Sized Chicken
Pound the chicken to an even ½-inch thickness so it cooks evenly from edge to center. Thin cutlets also develop a crispier crust and cook more quickly, making them ideal for this recipe.Choose Plain Cornflakes
Use plain, unsweetened cornflakes rather than frosted or flavored varieties. Their mild flavor creates the perfect crunchy coating while allowing the seasonings to stand out.Don’t Crush the Cornflakes Too Fine
Crush the cornflakes into mostly ¼-inch pieces while leaving a few larger flakes behind. This creates the signature crunchy texture that makes this chicken so satisfying.Let the Breading Rest
After coating the chicken, let it rest on the wire rack for about 10 minutes before baking. This simple step helps the breading adhere better and reduces the chance of the coating falling off during cooking.Bake on a Wire Rack
Placing the chicken on an oven-safe wire rack allows hot air to circulate around every piece, creating an evenly crisp coating instead of a soggy bottom.Cook to Temperature
For the juiciest results, use an instant-read thermometer instead of relying only on cooking time. Remove the chicken from the oven when it reaches 162–163°F, then let it rest for 5 minutes. Carryover cooking will bring it to the safe final temperature of 165°F.Let the Chicken Rest Before Serving
Allow the chicken to rest for 5 minutes after baking. This gives the juices time to redistribute throughout the meat, resulting in tender, flavorful chicken with a crisp coating.Reheat the Right Way
Leftover cornflake chicken reheats best in a 375°F oven or air fryer until hot and crispy. While the microwave works in a pinch, it softens the crunchy coating and won’t provide the same texture as oven reheating.🍗 More Crispy Chicken Recipes You’ll Love
If you enjoyed this crispy cornflake chicken, be sure to try some of these other delicious chicken recipes from Sugar Cloud Baking. From sweet and crunchy crusts to spicy favorites, there’s a recipe for every craving.
- Honey Walnut Crusted Chicken – A crispy, nutty chicken dinner with a sweet honey finish that’s perfect for weeknight meals or entertaining.
- Honey Pecan Crusted Chicken – Tender chicken coated in crunchy pecans and lightly sweetened with honey for an irresistible combination of flavors.
- Crispy Ranch Chicken Tenders – Homemade chicken tenders packed with ranch seasoning and baked until perfectly crispy.
- Coconut Curry Fried Chicken Tenders – Crispy chicken tenders with warm curry spices and a crunchy coconut coating for a unique twist on a classic favorite.
- Hot Honey Chicken – Sweet, spicy, and incredibly flavorful chicken coated in a sticky hot honey glaze that’s perfect for anyone who loves bold flavors.
Leave a Reply