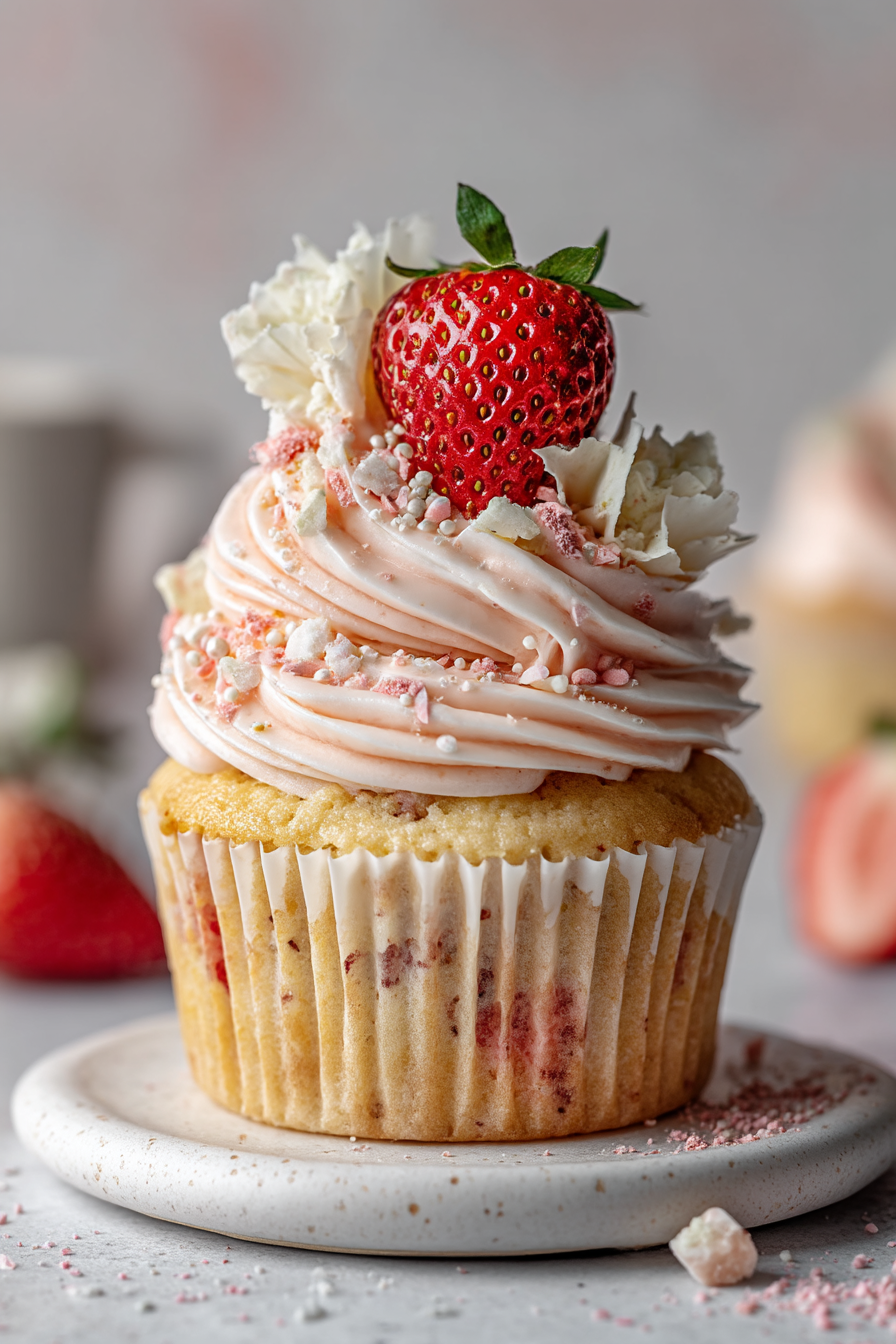
These Strawberry White Chocolate Cupcakes are irresistibly soft, moist, and bursting with fresh strawberry flavor in every bite. Made with a homemade strawberry reduction, juicy diced strawberries, and creamy white chocolate, these bakery-style cupcakes are finished with a luscious strawberry buttercream that’s as beautiful as it is delicious.
Whether you’re baking for Valentine’s Day, Mother’s Day, birthdays, baby showers, bridal showers, or simply treating yourself, this easy cupcake recipe is guaranteed to impress. The combination of sweet strawberries and rich white chocolate creates the perfect balance of fruity freshness and creamy indulgence, while the tender vanilla cupcake stays light and fluffy thanks to a few simple baking techniques.
If you’re looking for the best Strawberry White Chocolate Cupcakes, this recipe delivers stunning results with simple ingredients and foolproof instructions. Every cupcake is packed with real strawberry flavor, silky white chocolate, and topped with a gorgeous swirl of strawberry frosting that’s worthy of any bakery display.
💖 Why You’ll Love These Strawberry White Chocolate Cupcakes
Made with Real Strawberry Flavor
Fresh strawberries, a homemade strawberry reduction, and freeze-dried strawberry powder work together to create naturally sweet strawberry flavor in every bite.
Creamy White Chocolate in Every Bite
Finely chopped white baking chocolate melts into the cupcakes, adding rich, creamy pockets of sweetness that perfectly complement the fresh strawberries.
Soft, Moist, and Bakery-Style
Butter, sour cream, and a touch of oil create an incredibly tender crumb that stays moist for days while producing beautifully domed cupcakes.
Perfect for Any Celebration
These elegant cupcakes are perfect for birthdays, Valentine’s Day, Mother’s Day, bridal showers, baby showers, Easter, spring gatherings, and any occasion that calls for a beautiful homemade dessert.
Easy to Make at Home
Simple ingredients and easy-to-follow instructions make this recipe approachable for beginner bakers while delivering professional-quality Strawberry White Chocolate Cupcakes every time.
🍓 Ingredient Notes for Strawberry White Chocolate Cupcakes
Using high-quality ingredients makes all the difference when baking these Strawberry White Chocolate Cupcakes. Each ingredient has an important role in creating soft, fluffy cupcakes with vibrant strawberry flavor and creamy white chocolate in every bite.
All-Purpose Flour
All-purpose flour provides the perfect structure while keeping the cupcakes light and tender. Be sure to measure the flour correctly using the spoon-and-level method to avoid dense cupcakes.
Baking Powder and Baking Soda
This combination gives the cupcakes a beautiful rise and soft, airy texture. The baking soda also reacts with the sour cream to create an extra tender crumb.
Unsalted Butter
Butter adds rich flavor and contributes to the light, fluffy texture when creamed with the sugar. Always use softened, room-temperature butter for the best results.
Neutral Oil
A small amount of neutral oil helps keep the cupcakes moist for several days without making them heavy.
Granulated Sugar
Sugar sweetens the cupcakes while helping create a tender crumb and lightly golden tops.
Eggs
Room-temperature eggs blend smoothly into the batter, providing structure, moisture, and richness.
Vanilla Extract
Pure vanilla extract enhances both the strawberry and white chocolate flavors, creating a warm bakery-style taste.
Almond Extract (Optional)
A small amount of almond extract subtly enhances the natural sweetness of the strawberries without overpowering the cupcakes.
Strawberry Emulsion (Optional)
Strawberry emulsion provides an extra boost of strawberry flavor that holds up beautifully during baking.
Sour Cream
Full-fat sour cream creates an incredibly soft, moist cupcake while adding just enough tanginess to balance the sweetness.
Whole Milk
Whole milk adds richness and creates a smooth batter that bakes into tender cupcakes.
Strawberry Reduction
A homemade strawberry reduction concentrates fresh strawberry flavor without adding excess liquid, giving these cupcakes their signature fruity taste.
Fresh Strawberries
Use ripe, fresh strawberries for the sweetest flavor. Pat them completely dry before folding them into the batter to prevent excess moisture.
White Baking Chocolate
Finely chopped white baking chocolate melts into creamy pockets throughout the cupcakes. Baking chocolate provides a smoother texture than traditional white chocolate chips.
Freeze-Dried Strawberry Powder
This is the secret to a naturally flavored strawberry buttercream. It adds vibrant strawberry flavor without making the frosting runny.
Heavy Cream
Heavy cream helps create a silky, fluffy buttercream that’s easy to pipe and holds its shape beautifully.
Optional Strawberry Filling
For an extra burst of fruity flavor, fill each cupcake with thick strawberry preserves or homemade strawberry compote before frosting.
🧁 How to Make Strawberry White Chocolate Cupcakes
These Strawberry White Chocolate Cupcakes are easy to make with a few simple baking techniques. For the best texture, use room-temperature ingredients, dry the fresh strawberries well, and bake the cupcakes immediately after mixing the batter.
Make the Strawberry Reduction
Add chopped fresh strawberries to a small saucepan and cook over medium heat until the mixture thickens and reduces to a jam-like consistency. Let the strawberry reduction cool completely before adding it to the cupcake batter.
Prepare the Cupcake Batter
Whisk together the flour, baking powder, baking soda, and salt in a medium bowl. In a separate bowl, beat the butter and sugar until pale and fluffy, then mix in the oil, eggs, vanilla, sour cream, and cooled strawberry reduction.
Add the Dry Ingredients
Add the flour mixture to the wet ingredients in batches, alternating with the milk. Mix just until combined to keep the cupcakes soft, light, and tender.
Fold in the Strawberries and White Chocolate
Toss the diced strawberries with a little flour, then gently fold them into the batter with the chopped white baking chocolate. This helps the strawberries stay evenly distributed throughout the cupcakes.
Bake the Cupcakes
Divide the batter evenly among lined cupcake wells, filling each about two-thirds full. Bake until the tops spring back lightly and a toothpick inserted into the center comes out with a few moist crumbs.
Make the Strawberry White Chocolate Buttercream
Beat the softened butter until creamy, then gradually add powdered sugar, freeze-dried strawberry powder, melted white chocolate, vanilla, salt, and enough heavy cream to create a fluffy, pipeable frosting.
Fill and Frost
Once the cupcakes are completely cool, fill them with strawberry preserves or compote if desired. Pipe or spread the strawberry white chocolate buttercream on top and garnish with white chocolate curls, freeze-dried strawberry crumbs, or fresh strawberries.
🧁 Pro Tips for Strawberry White Chocolate Cupcakes
These easy tips will help you make soft, moist, bakery-style Strawberry White Chocolate Cupcakes with fluffy strawberry buttercream and rich white chocolate flavor every time.
Use Room-Temperature Ingredients
Room-temperature butter, eggs, milk, and sour cream blend together more smoothly, creating a lighter cupcake batter and a tender crumb.
Cool the Strawberry Reduction Completely
The strawberry reduction should be thick and fully cooled before adding it to the batter. Warm reduction can soften the butter mixture and affect the texture of the cupcakes.
Pat the Strawberries Dry
Fresh strawberries release moisture as they bake, so pat them very dry with paper towels before folding them into the batter. This helps prevent soggy cupcakes.
Chop the White Chocolate Finely
Finely chopped white baking chocolate melts more evenly into the cupcakes and creates creamy pockets of sweetness without sinking to the bottom.
Do Not Overmix the Batter
Once the flour is added, mix only until the ingredients are combined. Overmixing can make homemade cupcakes dense instead of soft and fluffy.
Bake Right Away
For the best rise and texture, bake the cupcakes immediately after mixing. This helps the baking powder and baking soda work properly.
Cool Before Frosting
Let the cupcakes cool completely before adding the strawberry white chocolate buttercream. Warm cupcakes can melt the frosting and make it difficult to pipe.
Adjust the Frosting Consistency
Add heavy cream slowly until the buttercream is smooth, fluffy, and pipeable. If the frosting is too soft, add a little more powdered sugar; if it is too thick, add a splash more cream.
🍓 Strawberry White Chocolate Cupcake Variations
These Strawberry White Chocolate Cupcakes are easy to customize for different flavors, holidays, and special occasions. Try one of these delicious variations to make this bakery-style cupcake recipe your own.
Add a Strawberry Filling
Core each cooled cupcake and fill it with strawberry preserves, homemade strawberry compote, or fresh strawberry jam for an extra burst of fruity flavor in every bite.
Use White Chocolate Chips
If you don’t have white baking chocolate, white chocolate chips work well as a substitute. Mini white chocolate chips distribute more evenly throughout the batter.
Make Lemon Strawberry Cupcakes
Add 1 teaspoon of finely grated lemon zest to the batter for a bright citrus flavor that naturally enhances the sweetness of the strawberries.
Try a Cream Cheese Frosting
Replace the strawberry buttercream with a strawberry cream cheese frosting for a tangy, rich topping that pairs beautifully with the fresh strawberries and white chocolate.
Add Crunch with Macadamia Nuts
Fold ½ cup of chopped roasted macadamia nuts into the batter for a buttery crunch that complements the creamy white chocolate.
Decorate for Holidays
Top the cupcakes with festive sprinkles, colored sanding sugar, heart-shaped decorations, or edible glitter to match Valentine’s Day, Mother’s Day, baby showers, birthdays, Easter, or bridal showers.
Make Mini Cupcakes
Divide the batter into mini cupcake liners and bake for 10–12 minutes. They’re perfect for parties, dessert tables, and bite-sized treats.
Use Raspberry Instead of Strawberry
Swap the strawberries for fresh raspberries and use raspberry preserves for a delicious twist that still pairs wonderfully with white chocolate.
📦 Storage and Make-Ahead Tips
These Strawberry White Chocolate Cupcakes stay soft and moist for several days when stored properly. Whether you’re baking ahead for a party or saving leftovers, these storage tips will help keep your cupcakes tasting fresh.
How to Store Strawberry White Chocolate Cupcakes
Store the frosted cupcakes in an airtight container in the refrigerator for up to 4 days. Because the frosting contains butter and the cupcakes are made with fresh strawberries, refrigeration is recommended for the best freshness.
Serve at Room Temperature
For the softest texture and best flavor, remove the cupcakes from the refrigerator about 20 to 30 minutes before serving. This allows the buttercream to soften and the cupcake crumb to become tender.
Freeze Unfrosted Cupcakes
Wrap the completely cooled cupcakes individually in plastic wrap, then place them in a freezer-safe container or zip-top freezer bag. Freeze for up to 3 months. Thaw overnight in the refrigerator or at room temperature before frosting.
Freeze Frosted Cupcakes
Freeze the frosted cupcakes uncovered until the buttercream is firm, then wrap each cupcake carefully and store them in a freezer-safe container for up to 2 months. Thaw overnight in the refrigerator and bring to room temperature before serving.
Make the Strawberry Reduction Ahead
The strawberry reduction can be prepared up to 5 days in advance. Store it in an airtight container in the refrigerator until you’re ready to bake.
Prepare the Buttercream in Advance
The strawberry white chocolate buttercream can be made up to 3 days ahead and stored in the refrigerator. Before using, let it come to room temperature and whip it again for a few minutes until smooth and fluffy.
Bake the Cupcakes Ahead of Time
Unfrosted cupcakes can be baked 1 day in advance. Once completely cooled, store them in an airtight container at room temperature, then frost them the day you plan to serve them for the freshest bakery-style results.
❓ Frequently Asked Questions About Strawberry White Chocolate Cupcakes
Can I use frozen strawberries for Strawberry White Chocolate Cupcakes?
Yes, you can use frozen strawberries for the strawberry reduction, but fresh strawberries are best for folding into the cupcake batter. If using frozen strawberries in the batter, thaw them completely, drain well, and pat them very dry to prevent excess moisture.
Can I use white chocolate chips instead of white baking chocolate?
Yes. White chocolate chips can be used, but finely chopped white baking chocolate melts more smoothly and gives these cupcakes a creamier texture. Mini white chocolate chips are the best chip option because they distribute more evenly.
Why are my strawberry cupcakes soggy?
Strawberry cupcakes can become soggy if the fresh strawberries are too wet, the strawberry reduction is too thin, or the batter is overmixed. For the best results, pat the diced strawberries dry and use a thick, fully cooled strawberry reduction.
Can I make these cupcakes without strawberry emulsion?
Yes. Strawberry emulsion is optional. These Strawberry White Chocolate Cupcakes still have delicious strawberry flavor from the fresh strawberries, strawberry reduction, and freeze-dried strawberry powder in the buttercream.
Can I fill these cupcakes?
Yes. For extra strawberry flavor, core the cooled cupcakes and fill each one with strawberry preserves, strawberry compote, or strawberry jam before frosting.
How do I keep cupcakes moist?
Use room-temperature ingredients, avoid overmixing the batter, and do not overbake. Sour cream, butter, and a small amount of oil help keep these homemade cupcakes soft, fluffy, and moist.
How should I store Strawberry White Chocolate Cupcakes?
Store frosted cupcakes in an airtight container in the refrigerator for up to 4 days. For the best flavor and texture, let them sit at room temperature for 20 to 30 minutes before serving.
Can I freeze these cupcakes?
Yes. Unfrosted cupcakes can be wrapped tightly and frozen for up to 3 months. Thaw completely before filling and frosting. Frosted cupcakes can also be frozen for up to 2 months if stored carefully in a freezer-safe container.

Strawberry White Chocolate Cupcakes
Equipment
- 12-cup muffin pan
- Paper cupcake liners
- Small saucepan
- Mixing bowls
- Measuring cups and spoons
- Kitchen scale (recommended)
- Electric hand mixer or stand mixer
- Whisk
- Rubber spatula
- Cooling rack
- piping bag
- Large star piping tip (such as Wilton 1M or 2D)
- Cupcake corer or small paring knife (optional, for filling)
Ingredients
Strawberry Reduction
- 1 cup fresh strawberries chopped
Cupcakes
- 1½ cups plus 2 tablespoons 190 g all-purpose flour
- 1½ teaspoons baking powder
- ¼ teaspoon baking soda
- ½ teaspoon fine sea salt
- 6 tablespoons 85 g unsalted butter, softened
- ¾ cup 150 g granulated sugar
- 2 tablespoons neutral oil canola, vegetable, or avocado
- 2 large eggs room temperature
- 2 teaspoons pure vanilla extract
- ¼ teaspoon almond extract optional
- ½ teaspoon strawberry emulsion optional
- ⅓ cup 80 g full-fat sour cream, room temperature
- 3 tablespoons whole milk room temperature
- 1½ tablespoons cooled strawberry reduction
- ⅔ cup 100 g finely diced fresh strawberries, patted completely dry
- 4½ ounces 128 g white baking chocolate, finely chopped
- 1 tablespoon all-purpose flour for coating the strawberries
Strawberry White Chocolate Buttercream
- 1 cup 226 g unsalted butter, softened
- 3 cups 360 g powdered sugar
- ¼ cup freeze-dried strawberry powder sifted
- 2 ounces 56 g white baking chocolate, melted and cooled
- 1 teaspoon vanilla extract
- Pinch of fine sea salt
- 2–3 tablespoons heavy cream
Optional Filling
- Strawberry preserves or thick strawberry compote
Instructions
- Place the chopped strawberries in a small saucepan over medium heat. Cook, stirring occasionally, for 10–15 minutes until reduced to about 1½ tablespoons and thick like jam. Cool completely.
- Preheat the oven to 350°F (175°C). Line a 12-cup muffin pan with cupcake liners.
- In a medium bowl, whisk together the flour, baking powder, baking soda, and salt.
- In a large mixing bowl, beat the butter and sugar on medium-high speed for 4–5 minutes until very light and fluffy.
- Beat in the oil until fully incorporated.
- Add the eggs one at a time, beating well after each addition. Mix in the vanilla, almond extract (if using), strawberry emulsion (if using), sour cream, and cooled strawberry reduction.
- Add the dry ingredients in three additions, alternating with the milk. Begin and end with the dry ingredients, mixing just until combined after each addition.
- Toss the diced strawberries with 1 tablespoon flour, then gently fold the strawberries and chopped white chocolate into the batter using a rubber spatula.
- Divide the batter evenly among the cupcake liners, filling each about ⅔ full.
- Bake for 20–22 minutes, or until the tops spring back lightly and a toothpick inserted into the center comes out with just a few moist crumbs.
- Let the cupcakes cool in the pan for 5 minutes before transferring them to a wire rack to cool completely.
- To make the buttercream, beat the butter until creamy. Gradually add the powdered sugar, freeze-dried strawberry powder, melted white chocolate, vanilla, and salt. Beat in enough heavy cream to create a light, fluffy, pipeable frosting.
- If desired, core each cooled cupcake and fill with about 1 tablespoon of strawberry preserves or strawberry compote.
- Pipe or spread the buttercream onto the cooled cupcakes. Garnish with white chocolate curls, freeze-dried strawberry crumbs, or a fresh strawberry.
Notes
- Reduce the strawberries first. Simmering fresh strawberries into a thick reduction concentrates their natural sweetness and flavor without adding excess moisture to the batter.
- Pat the diced strawberries dry. Fresh strawberries contain a lot of water, so drying them well helps prevent soggy cupcakes.
- Toss the strawberries with flour. Coating the diced strawberries in a little flour helps keep them evenly distributed throughout the cupcakes instead of sinking to the bottom.
- Use room-temperature ingredients. Butter, eggs, milk, and sour cream blend together more easily, creating a smooth batter and a tender crumb.
- Cream the butter and sugar thoroughly. Beating them for 4–5 minutes incorporates air into the batter, resulting in lighter, fluffier cupcakes.
- Mix gently once the flour is added. Overmixing develops gluten, which can make cupcakes dense instead of soft.
- Use high-quality white baking chocolate. Baking chocolate melts more smoothly than white chocolate chips, giving every bite a creamy, rich flavor.
- Cool the strawberry reduction completely. Adding warm reduction can soften the butter mixture and affect the cupcake’s texture.
- Don’t overbake. Begin checking the cupcakes around the 20-minute mark. They’re done when the tops spring back lightly and a toothpick comes out with a few moist crumbs.
- Cool completely before frosting. Warm cupcakes will melt the buttercream and make decorating difficult.
- Pipe like a bakery. Use a large star tip for tall swirls of strawberry buttercream and finish with white chocolate curls, freeze-dried strawberry crumbs, or a fresh strawberry for a beautiful presentation.
- For even more strawberry flavor, fill each cupcake with a spoonful of strawberry preserves or homemade strawberry compote before frosting.
🧁 More Irresistible Cupcake Recipes to Try
If you love these Strawberry White Chocolate Cupcakes, be sure to try some of my other homemade cupcake recipes. From rich chocolate classics to fruity favorites, there’s a cupcake for every occasion!
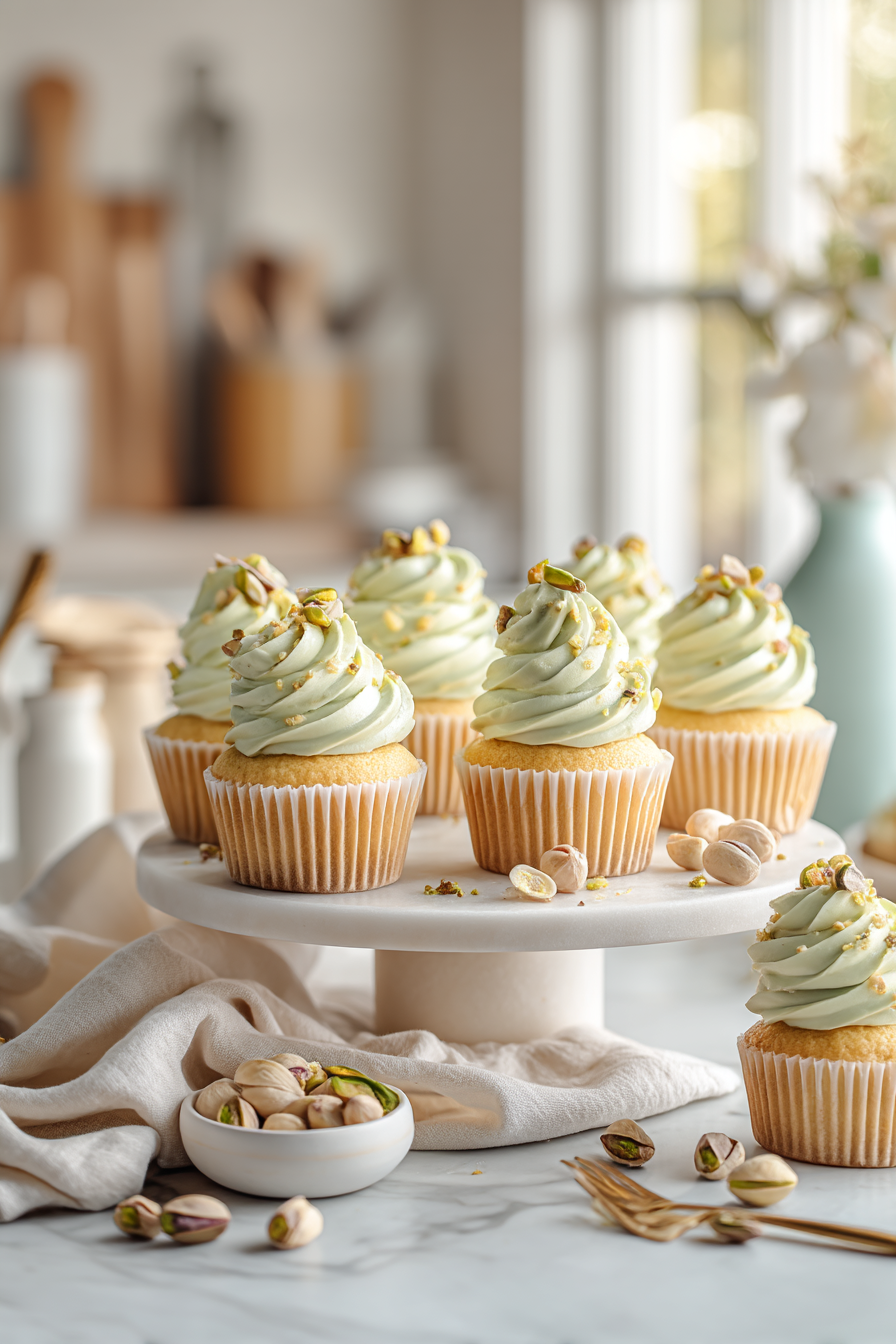
- Pistachio Cupcakes – Soft, nutty cupcakes topped with a creamy pistachio frosting that’s perfect for spring and special occasions.
- Twinkie Cupcakes – A fun homemade version of the classic snack cake featuring fluffy vanilla cupcakes with a creamy filling.
- Watermelon Cupcakes – Bright, colorful cupcakes bursting with sweet summer flavor and topped with vibrant buttercream.
- Caramel Latte Cupcakes – Rich coffee cupcakes topped with smooth caramel frosting for the perfect coffeehouse-inspired dessert.
- Mississippi Mud Cupcakes – Decadent chocolate cupcakes loaded with marshmallow and rich chocolate flavors for chocolate lovers.