
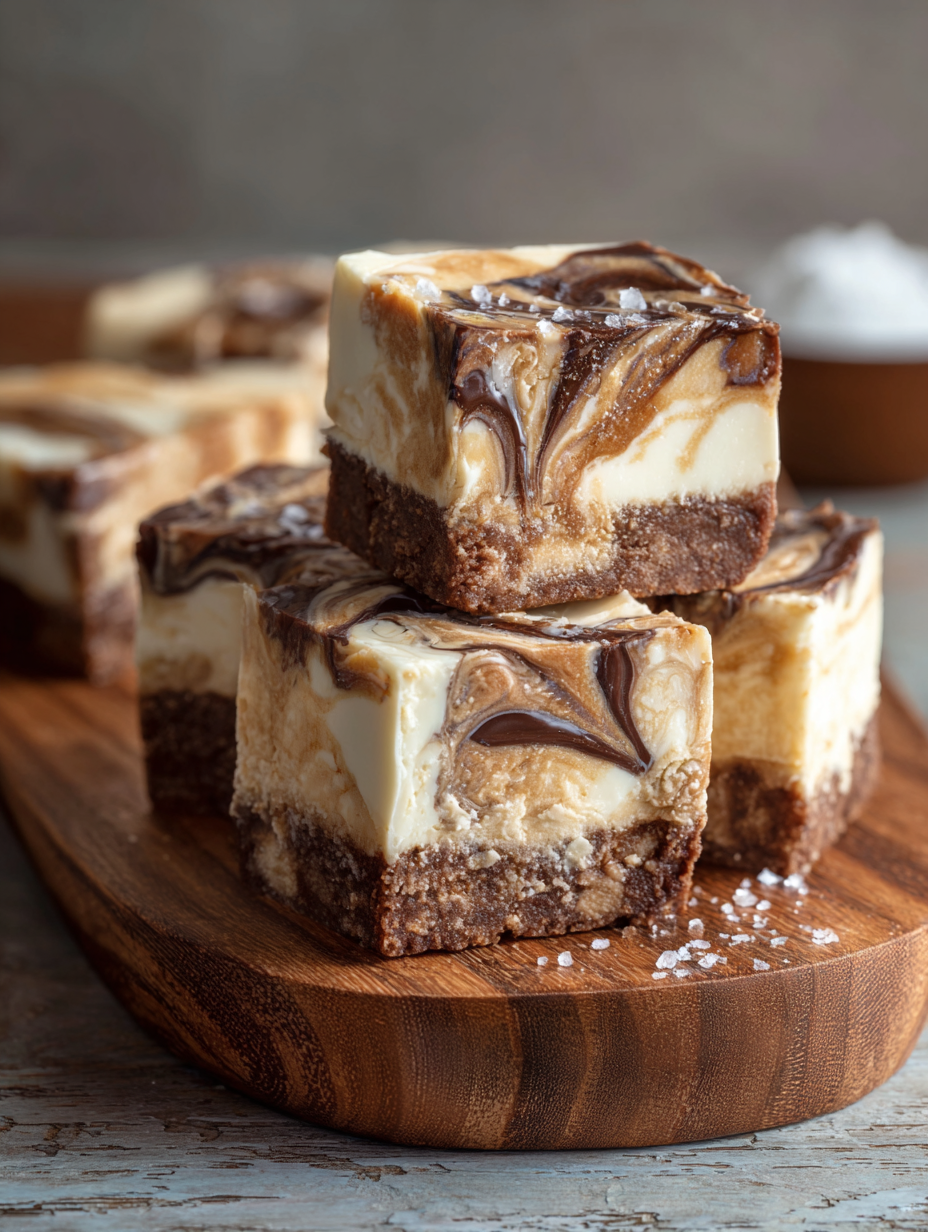
If you love classic soda shop flavors, this root beer float fudge is about to become your new favorite treat. It combines a rich, buttery root beer layer with a smooth vanilla “float” topping, creating the perfect balance of creamy sweetness and bold root beer flavor. Every bite melts in your mouth just like a real root beer float—only in soft, sliceable fudge form.
This easy layered fudge recipe is made with simple ingredients like white chocolate, marshmallow crème, and sweetened condensed milk, making it practically foolproof even for beginners. Whether you’re making it for holidays, parties, or homemade gifts, this nostalgic dessert is guaranteed to stand out and impress.
🍬 Why You’ll Love This Root Beer Float Fudge
This root beer float fudge is a fun, nostalgic dessert that brings together the bold flavor of root beer and the creamy sweetness of a vanilla float in one rich, sliceable treat. It is smooth, flavorful, and perfect for anyone who loves old-fashioned soda shop desserts with a homemade twist.
🥤 Bold Root Beer Float Flavor
The combination of root beer extract and a creamy vanilla layer gives this fudge that classic root beer float dessert flavor. Every bite tastes sweet, rich, and just a little nostalgic.
✨ Easy Fudge Recipe for Beginners
This recipe is simple to make with pantry-friendly ingredients like white chocolate chips, marshmallow crème, butter, and sweetened condensed milk. If you have been looking for an easy fudge recipe with impressive results, this one is a great choice.
🎂 Beautiful Layered Presentation
The two layers create a gorgeous finish that looks bakery-worthy without extra effort. The root beer base and creamy vanilla topping make this layered fudge recipe perfect for parties, holiday trays, and edible gifts.
🎁 Perfect for Holidays and Gifting
This creamy root beer fudge recipe slices beautifully and stores well, making it ideal for cookie boxes, dessert platters, and homemade treats during the holidays. It is a unique fudge flavor that always stands out.
⏳ Make-Ahead Friendly
Because this fudge needs time to chill and set, it is a great dessert to prepare in advance. You can make it ahead for gatherings, celebrations, or weekend baking and have a rich, crowd-pleasing treat ready to go.
🧈 Ingredient Notes for Root Beer Float Fudge
Using the right ingredients is the key to making smooth, creamy, and flavorful root beer float fudge. Each ingredient helps create the nostalgic flavor and soft texture that makes this layered fudge so special.
🥤 Root Beer
Root beer adds that classic soda shop flavor to the fudge base. It gives the recipe its signature background taste, but keep in mind that the strongest flavor comes from the extract. Measure the root beer as liquid rather than foam for the most accurate results.
🍬 Root Beer Extract
Root beer extract is the main ingredient that gives this fudge its bold root beer float flavor. Do not skip it, because the soda alone will not give the same strong taste. Start with the lower amount if you want a milder flavor, or use a little more for a stronger root beer finish.
🍫 White Chocolate Chips
White chocolate chips help create the rich, creamy texture in both layers of this fudge. Use white chocolate chips instead of candy melts for the best flavor and consistency. Choose a good-quality brand so the fudge melts smoothly and sets properly.
🥄 Marshmallow Crème
Marshmallow crème makes the root beer layer smooth, soft, and easy to slice. It also helps give the fudge that classic old-fashioned texture that feels creamy instead of dry or crumbly.
🧈 Butter and Heavy Cream
The combination of butter and heavy cream makes the fudge rich and silky. These ingredients balance the sweetness and help create the soft, melt-in-your-mouth texture that makes this easy fudge recipe so satisfying.
🥛 Sweetened Condensed Milk
Sweetened condensed milk gives the vanilla “float” layer its sweet, creamy texture. It blends with the white chocolate to create a smooth topping that looks beautiful and tastes just like the vanilla part of a real root beer float.
🌿 Vanilla Extract
A little vanilla extract helps round out the flavor in both layers. It enhances the creamy topping and gives the whole dessert a more balanced root beer float taste.
🧂 Salt
A small amount of salt helps balance the sweetness and makes the root beer flavor stand out more. Even though it is a small ingredient, it makes a big difference in the final flavor.
🎨 Optional Brown Food Coloring
If you want a deeper soda-inspired look, you can add a few drops of brown food coloring to the root beer layer. This step is optional, but it can make the finished fudge look even more like a classic root beer float dessert.
🍬 How to Make Root Beer Float Fudge
This root beer float fudge comes together in two simple layers: a rich root beer fudge base and a creamy vanilla topping that mimics the float. The process is easy to follow, and the result is a smooth, nostalgic dessert that looks just as good as it tastes.
🧻 1. Prepare the Pan
Line an 8×8-inch pan with parchment paper, leaving some overhang on the sides for easy lifting later. Lightly grease the pan or parchment so the fudge releases cleanly once chilled and set.
🍦 2. Make the Vanilla Float Layer
In a microwave-safe bowl, combine the white chocolate chips and sweetened condensed milk. Microwave in short intervals, stirring well between each one, until the mixture is fully melted, smooth, and glossy. Stir in the vanilla extract and salt, then set the mixture aside. If it thickens too much before assembly, microwave it briefly again until it becomes spreadable.
🥤 3. Cook the Root Beer Fudge Base
In a medium saucepan, combine the sugar, heavy cream, butter, root beer, and optional corn syrup. Heat the mixture over medium heat, stirring until everything is fully melted and smooth. Bring it to a full rolling boil, then cook until it reaches 236–238°F. If you do not have a thermometer, boil it for about 4 minutes after the full boil begins.
🍫 4. Finish the Root Beer Layer
Remove the saucepan from the heat and let the bubbling calm for about 1 minute. Stir in the marshmallow crème until melted, then add the white chocolate chips in two additions. Stir gently until the mixture is smooth, glossy, and fully melted. Once smooth, mix in the root beer extract, vanilla extract, salt, and optional brown food coloring.
🥄 5. Pour and Let the Base Set Slightly
Pour the root beer fudge mixture into the prepared pan and smooth the top. Let it sit for about 3 to 5 minutes, or until the surface looks slightly matte and leaves a soft fingerprint when touched. This helps the layers stay separate while still sticking together properly.
🤍 6. Add the Vanilla Topping
Pour the vanilla layer over the root beer base and spread it gently into an even layer. If you want a swirled effect, use a knife or skewer to make a few light swirls across the top without overmixing the layers.
❄️ 7. Chill Until Firm
Transfer the pan to the refrigerator and chill the fudge for 4 to 6 hours, or until fully set. For the cleanest slices and best texture, letting it chill overnight works even better.
🔪 8. Slice and Serve
Once the fudge is firm, lift it out of the pan using the parchment overhang. Let it sit at room temperature for 10 to 15 minutes before slicing. Cut into squares with a warm knife, wiping the blade between cuts for clean, bakery-style edges.
✨ Pro Tips for Perfect Root Beer Float Fudge
Follow these expert tips to make smooth, creamy, and perfectly set root beer float fudge every time. These small details can make a big difference in texture, flavor, and overall success.
🌡️ Use a Thermometer for Best Results
For the most reliable texture, cook the fudge base to 236–238°F (soft-ball stage). This ensures your homemade fudge sets properly without becoming too soft or crumbly.
⏱️ Don’t Overcook the Fudge
Cooking past 238°F can lead to dry or crumbly fudge. Stick closely to the recommended temperature or timing to keep your fudge recipe smooth and creamy.
🥄 Stir Gently After Cooking
Once you add the marshmallow crème and white chocolate, stir just until everything is melted and smooth. Overmixing can cause a grainy texture in your white chocolate fudge.
🍫 Melt White Chocolate Properly
Microwave the white chocolate in short intervals and stir well between each one. Stop when the mixture is fully melted, glossy, and smooth with no visible chips. This helps create a silky layered fudge recipe.
🥤 Use Root Beer Extract for Strong Flavor
The root beer adds subtle flavor, but the root beer extract is what gives this dessert its bold, classic root beer float taste. Adjust the amount slightly based on your preference.
🧊 Let the Base Cool Before Adding the Top Layer
Allow the root beer layer to cool for a few minutes before adding the vanilla topping. The surface should look slightly matte and feel warm, not hot. This keeps the layers distinct while still helping them stick together.
🔪 Cut with a Warm Knife
For clean, professional-looking slices, use a warm knife and wipe it between cuts. This makes your root beer fudge look bakery-quality.
🧻 Use Parchment for Easy Removal
Lining your pan with parchment paper and leaving overhang makes it easy to lift out the fudge and cut it into even squares without sticking.
❄️ Chill Long Enough for Best Texture
Give the fudge at least 4–6 hours to set, but overnight chilling gives the best texture and cleanest cuts for this easy fudge recipe.
🍭 Root Beer Float Fudge Variations
This root beer float fudge is easy to customize with fun flavors and creative twists. Whether you want to enhance the classic taste or try something new, these variations will help you create a unique layered fudge recipe every time.
🍫 Chocolate Root Beer Float Fudge
Add a chocolate twist by mixing mini chocolate chips into the root beer layer or drizzling melted chocolate over the top. The combination of chocolate and root beer creates a rich, dessert-like flavor similar to a chocolate soda.
🍦 Extra Creamy Vanilla Float Layer
For a stronger “float” flavor, increase the vanilla extract slightly or add a small splash of heavy cream to the top layer. This creates an even creamier texture that mimics melted vanilla ice cream.
🍬 Root Beer Candy Fudge
Fold in chopped root beer barrel candies or root beer-flavored sweets into the base layer for extra flavor and a fun texture. This variation adds bursts of nostalgic candy flavor throughout the fudge.
🌈 Swirled Root Beer Fudge
Instead of a clean layer, swirl the vanilla and root beer mixtures together for a marbled effect. This creates a visually stunning root beer dessert with a more blended flavor in each bite.
🥜 Root Beer Float Fudge with Nuts
Add chopped pecans or walnuts to the root beer layer for a bit of crunch. The nutty texture contrasts nicely with the smooth fudge and adds depth to this easy fudge recipe.
🍓 Fruity Float Fudge
Try adding a thin layer of strawberry or cherry flavor to the top to create a fun soda fountain-inspired twist. These fruity flavors pair surprisingly well with root beer for a unique dessert variation.
🍪 Cookie Crumble Topping
Sprinkle crushed vanilla cookies or shortbread over the top layer before chilling. This adds a subtle crunch and enhances the creamy “float” flavor of the fudge.
🎁 Holiday Root Beer Fudge
Decorate the top with festive sprinkles or drizzle with white chocolate for a holiday-ready presentation. This makes your homemade fudge perfect for gifting and seasonal dessert trays.
🧊 Storage and Make-Ahead Tips for Root Beer Float Fudge
This root beer float fudge stores beautifully and is perfect for making ahead. Proper storage helps maintain its smooth texture, creamy consistency, and fresh flavor.
🧺 How to Store Root Beer Float Fudge
Store the fudge in an airtight container in the refrigerator to keep it firm and fresh. Place parchment paper between layers to prevent sticking. Properly stored, this homemade fudge will stay fresh for up to 1–2 weeks.
🌡️ Room Temperature Storage
You can keep the fudge at room temperature for up to 3–4 days if your kitchen is cool. However, refrigeration is recommended for the best texture and clean slices, especially for this layered fudge recipe.
❄️ Freezing Instructions
This root beer fudge recipe freezes very well. Wrap the fudge tightly in plastic wrap, then place it in an airtight container or freezer bag. Freeze for up to 2–3 months. Thaw in the refrigerator overnight before serving.
⏳ Make-Ahead Tips
This is an ideal make-ahead dessert because it needs time to chill and set. Prepare it a day in advance for the best texture and flavor. Making it ahead also allows the layers to fully firm up, making slicing easier and cleaner.
🔪 Serving Tip
For the best texture, let the fudge sit at room temperature for 10–15 minutes before serving. This softens it slightly and enhances the creamy, melt-in-your-mouth consistency.
❓ Frequently Asked Questions About Root Beer Float Fudge
What does root beer float fudge taste like?
Root beer float fudge tastes like a creamy, nostalgic combination of bold root beer candy flavor and sweet vanilla ice cream. The vanilla top layer gives it that classic float-inspired finish, while the root beer base adds the signature soda shop taste.
Do I need root beer extract for root beer float fudge?
Yes, root beer extract is the main ingredient that gives this fudge its strong root beer flavor. The soda adds background flavor, but the extract is what makes the dessert taste like a true root beer float dessert.
Can I make root beer float fudge without a candy thermometer?
Yes, you can still make this easy fudge recipe without a thermometer. If needed, boil the mixture for about 4 minutes after it reaches a full rolling boil, or use the cold water test. A small drop of the mixture should form a soft ball that flattens easily when pressed.
Why is my fudge too soft?
If your fudge is too soft, the sugar mixture likely did not cook long enough. For the best texture, cook the root beer base to 236–238°F. Undercooking is one of the most common reasons homemade fudge does not set properly.
Why is my fudge crumbly?
Fudge can turn crumbly if it is cooked past the recommended temperature. If the mixture goes above 238°F, the texture can become dry instead of smooth and creamy. Sticking closely to the correct temperature helps create the best white chocolate fudge texture.
Can I use white chocolate bars instead of white chocolate chips?
For the most consistent results, this recipe is best made with white chocolate chips rather than candy melts. Chopped white chocolate can work, but it may create a slightly softer finish depending on the brand.
How long does root beer float fudge last?
Stored in an airtight container in the refrigerator, this root beer fudge recipe will stay fresh for about 1 to 2 weeks. You can also freeze it for longer storage.
Can I freeze root beer float fudge?
Yes, this fudge freezes very well. Wrap it tightly and store it in an airtight container or freezer bag for up to 2–3 months. Thaw it in the refrigerator overnight before serving.
Can I make root beer float fudge ahead of time?
Yes, this is a great make-ahead dessert. In fact, making it a day ahead gives the fudge more time to fully set, which improves the texture and makes it easier to slice cleanly.
Why are my fudge layers separating?
The layers can separate if the root beer base is too hot or too cold when the vanilla layer is added. Let the base sit until it feels warm, not hot, and the surface looks slightly matte before adding the top layer. This helps the layers stick together while still keeping them distinct.

🍬 Root Beer Float Fudge
Equipment
- 8×8 inch baking pan
- Parchment paper
- Medium saucepan
- Mixing bowls
- Heat-resistant spatula
- Whisk
- Measuring cups and spoons
- Microwave-safe bowl (for vanilla layer)
- Rubber scraper or offset spatula (to smooth layers)
- Knife for slicing
Ingredients
Root Beer Layer
- 2 cups granulated sugar
- ½ cup heavy cream
- ½ cup unsalted butter
- ¼ cup root beer measured liquid, not foam
- 1 tbsp light corn syrup optional
- 1 7 oz jar marshmallow crème
- 10 oz about 1⅔ cups white chocolate chips (not candy melts)
- 2–2½ tsp root beer extract
- ½ tsp vanilla extract
- ¼ tsp salt
- Optional: brown food coloring
Vanilla “Float” Layer
- 7.5 oz about 1¼ cups white chocolate chips (not candy melts)
- ⅓ cup + 1 tsp sweetened condensed milk
- 1 tsp vanilla extract
- pinch–¼ tsp salt
Instructions
Prepare Pan
- Line an 8×8-inch pan with parchment paper, leaving overhang. Lightly grease.
Make Vanilla Layer
- In a microwave-safe bowl, combine white chocolate chips and sweetened condensed milk.
- Microwave in 20-second intervals, stirring between each, until smooth and glossy with no visible chips.
- Stir in vanilla extract and salt. Set aside. If thickened, microwave 10 seconds before using.
Melt Root Beer Base
- In a medium saucepan, combine sugar, heavy cream, butter, root beer, and corn syrup (if using).
- Heat over medium, stirring until fully smooth.
Boil
- Bring to a full rolling boil (large bubbles across entire surface).
- Cook to 236–238°F.
- Do not exceed 238°F or fudge may become crumbly.
- If no thermometer, boil about 4 minutes after full boil begins.
- Cold water test: forms a soft ball that flattens easily.
Cool Slightly
- Remove from heat and let sit about 1 minute until bubbling calms.
Finish Fudge
- Stir in marshmallow crème until melted.
- Add white chocolate chips in 2 additions, stirring gently until smooth and glossy with no visible chips.
- Stop stirring once smooth.
- Stir in root beer extract, vanilla extract, salt, and optional coloring.
Pour Base Layer
- Pour mixture into prepared pan.
- Do not scrape crystallized sugar from sides of saucepan.
Let Set Slightly
- Let sit 3–5 minutes until surface looks slightly matte and leaves a soft fingerprint.
Add Vanilla Layer
- Pour vanilla mixture on top and spread gently.
- Optional: lightly swirl.
Chill
- Refrigerate 4–6 hours or until fully set.
Slice
- Let sit at room temperature 10–15 minutes.
- Cut with a warm knife, wiping between cuts.
Notes
- For best results, use white chocolate chips (not candy melts) to achieve a smooth, creamy fudge texture and proper set.
- Cook the sugar mixture to 236–238°F (soft-ball stage) for perfectly firm yet creamy fudge. Do not exceed 238°F or the fudge may become dry or crumbly.
- If you don’t have a thermometer, use the cold water test: a small drop should form a soft ball that flattens easily when pressed.
- The root beer adds subtle background flavor, while root beer extract provides the main flavor, so don’t skip it.
- Avoid scraping crystallized sugar from the sides of the saucepan when pouring, as this can cause grainy fudge.
- Let the base layer cool slightly before adding the top layer to ensure clean layers that stick together without blending.
- If the vanilla layer thickens before spreading, microwave it briefly (about 10 seconds) until smooth and spreadable again.
- For clean, bakery-style slices, cut the fudge with a warm knife and wipe between cuts.
- Store fudge in an airtight container in the refrigerator for the best texture and freshness.
- This root beer float fudge recipe is perfect for holidays, gifting, parties, or nostalgic dessert lovers.
🍬 More Root Beer Desserts You’ll Love
If you love the nostalgic flavor of root beer float fudge, there are plenty of other fun and creative recipes to try. From creamy desserts to baked treats and even savory twists, these recipes highlight the bold, sweet flavor of root beer in delicious new ways.
- 🍮 Creamy Root Beer Pudding – A smooth and rich dessert with classic root beer flavor in every bite.
- 🧁 Root Beer Float Cupcakes – Fluffy cupcakes with a nostalgic soda shop flavor and creamy frosting.
- 🍗 Root Beer BBQ Chicken Wings – A sweet and savory twist that shows how versatile root beer can be in cooking.
- 🥤 Vanilla Root Beer Milkshake – A thick, creamy drink inspired by the classic root beer float combination of soda and vanilla. Root beer floats traditionally combine soda and ice cream for a rich, fizzy dessert experience. :contentReference[oaicite:0]{index=0}
These recipes are perfect if you want to explore more root beer desserts and creative ways to use this classic flavor beyond just drinks.
Leave a Reply